You’ve just finished baking a delicious cake. It smells amazing, the texture is perfect, and the filling is rich and flavorful. But now you’re facing the next challenge: how to decorate it without fancy tools or store-bought embellishments?
The truth is, you don’t need a professional piping set, edible gold dust, or silicone molds to make a cake visually stunning. With creativity, intention, and a few common items from your kitchen or pantry, you can create beautiful decorations that are just as impressive — and often more charming — than the ones made with expensive equipment.
In this guide, we’ll walk you through easy, cost-free ways to decorate your homemade cakes using what you already have. This article builds directly on article #23, which focused on fillings, and ties into the entrepreneurial spirit introduced in articles #20 and #21. Whether you’re baking for yourself, loved ones, or clients, these ideas will help you create cakes that are as beautiful as they are delicious.
1. Start With a Clean, Smooth Base
Before decorating, make sure your cake is completely cool. Apply a crumb coat — a thin layer of frosting that traps loose crumbs — and then a final layer of your preferred frosting or spread. You can use whipped cream, ganache, buttercream, or even dulce de leche. Smooth it using a butter knife, the back of a spoon, or a piece of parchment paper folded in half.
2. Everyday Utensils That Work Wonders
You’d be amazed at how many everyday kitchen tools can help you decorate like a pro. Here are a few:
- Spoons: Use the back of a spoon to create elegant swoops or rustic waves in the frosting.
- Forks: Great for creating textured lines around the sides or crisscross patterns on top.
- Butter Knives: Create ridges or smooth finishes with a simple spreading motion.
- Plastic Sandwich Bags: Fill with icing or cream, snip a tiny corner, and you have an instant piping bag.
- Toothpicks or Skewers: Use to draw hearts, swirls, or floral patterns in soft icing.
- Mesh Strainers: Dust powdered sugar, cocoa powder, or cinnamon evenly over your cake.
- Glass Cups: Use the rim of a small glass to create circle patterns or to press out designs on top of the cake.
3. Use Ingredients You Already Have
You don’t need edible pearls or metallic sprays. Instead, look around your pantry and fridge. Many tasty and beautiful ingredients are probably already on hand:
- Fresh Fruits: Strawberries, kiwi, grapes, bananas, blueberries — slice or fan them for natural pops of color.
- Citrus Zest: Lemon or orange zest adds both brightness and fragrance.
- Dried Fruits & Nuts: Raisins, chopped almonds, walnuts, or dried apricots offer texture and elegance.
- Shaved Chocolate or Cocoa Powder: A chocolate bar and a vegetable peeler can give you gourmet-looking curls.
- Grated Coconut: Light, fluffy, and perfect for a tropical vibe.
- Cookies or Crackers: Crushed Oreos or vanilla wafers make a fun and crunchy topping.
- Jam or Honey Drizzle: Warm slightly and pour in zigzags or swirls across the cake surface.
4. Creative Themes Without Spending a Cent
Want a cake that tells a story? Use what you have:
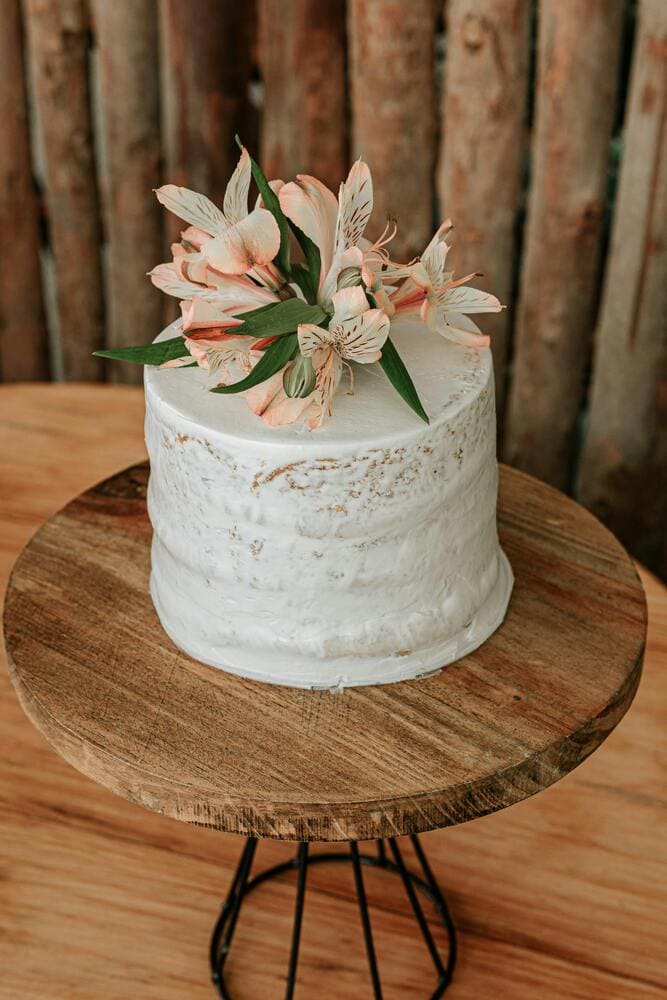
- Rustic: Go for rough frosting swirls, fresh fruit, and herbs like mint or rosemary.
- Elegant: Smooth finish with a fine dusting of cocoa and a single berry in the center.
- Festive: Add homemade paper flags or a message banner made with string and toothpicks.
- Kids’ Favorite: Colorful sprinkles (or crushed cereal) and a few cleaned small toys as toppers.
5. Printable or Handmade Cake Toppers
A printer and a little tape go a long way. Print cute messages like “Happy Birthday,” “Sweet 16,” or “Thank You,” cut them into flags or shapes, and tape them to toothpicks or skewers. If you don’t have a printer, handwritten toppers on colored paper work beautifully too.
6. Let Your Freezer Help You
Want sharp edges and stable frosting? Chill your cake for 10–15 minutes between layers of frosting. This helps you build structure and makes it easier to decorate with less mess.
7. The Power of Texture
If you’re using buttercream or whipped cream, try texturing the surface:
- Dab gently with a clean sponge for a vintage “stucco” look.
- Press a fork vertically around the edges for a ridged finish.
- Swipe diagonally with a spatula for a wave effect.
8. Decorating for Customers? Simplicity Wins
If you’re selling cakes, remember: clients value presentation — but that doesn’t mean complex. Clean, neat, and charming can be even more appealing than over-the-top designs. Think of your cake as a product that tells a story — homemade, heartfelt, and delicious.
Photos of these cakes on Instagram or Facebook don’t need a studio. A natural-lit corner, a simple background, and a cake decorated with care can sell more than any marketing pitch.
9. Storage and Transport Tips
- Always chill decorated cakes with whipped cream or fresh fruit before delivery.
- Place cakes in tight-fitting boxes to avoid shifting.
- Decorate with final touches (like powdered sugar or mint leaves) only after transport.
10. Bonus Tip: Use Leftovers Creatively
Have leftover frosting, fruit, or cake crumbs? Pipe mini cupcakes, fill sandwich cookies, or freeze components for future use. Nothing goes to waste in a creative kitchen.
Emotional Value Matters More Than Perfection
When you decorate a cake with love, even the simplest techniques shine. The smile of a child when they see sprinkles, the surprise of a friend when their birthday cake includes their favorite fruit — that’s what really counts.
Don’t let a lack of tools hold you back. Your hands, heart, and home already hold everything you need.
Coming Next: Whole-Grain Cake Recipes That Don’t Compromise Flavor
Article #25 will guide you in adapting traditional recipes to whole-grain versions — offering a healthier take that keeps taste and texture front and center.