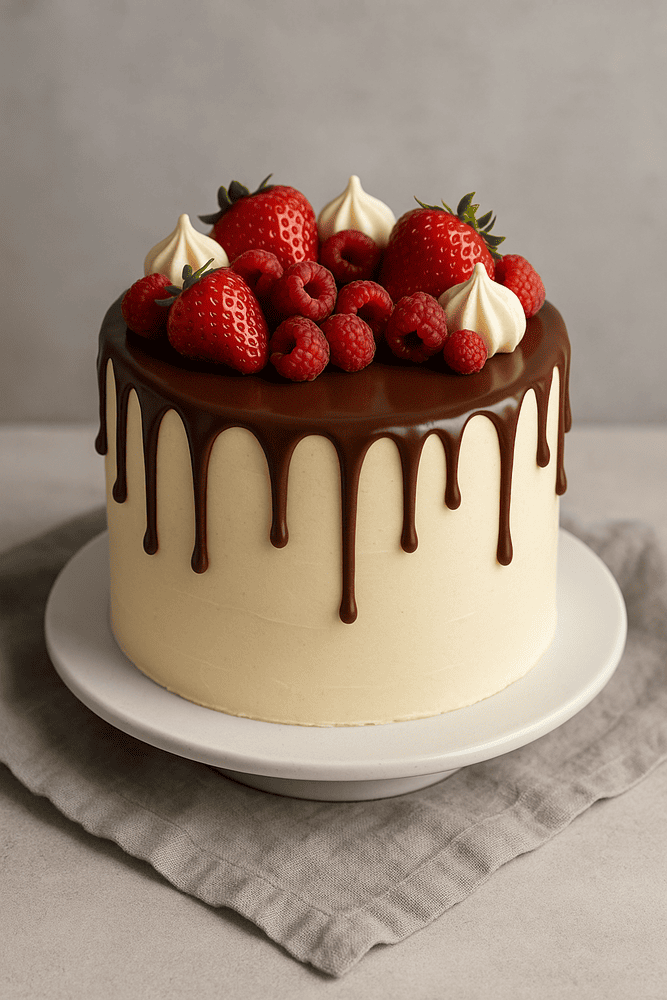
Drip cakes are eye-catching, trendy, and surprisingly easy to make once you know the right techniques. Whether you’re creating a birthday showstopper or an elegant celebration centerpiece, the dramatic effect of dripping ganache or colorful glaze down the sides of a cake never fails to impress. In this guide, we’ll walk you through everything you need to know to make drip cakes that truly wow — from choosing the perfect base cake to mastering the drip consistency and decorating with flair.
Drip cakes combine simplicity with drama. The visual appeal of smooth drips cascading down a frosted cake creates a professional-looking finish that’s totally achievable at home. They’re also incredibly versatile — you can match the drip color to your event theme, use white chocolate, dark chocolate, colored candy melts, or even fruit glazes. Once you learn the basics, the possibilities are endless.
Before you even think about dripping, your cake should be completely cooled, filled, and frosted. A stable and well-chilled base ensures that your drips behave properly and don’t melt into your frosting. If you’re unsure about layering or stacking your cakes, review our previous guide: “Layer Cakes 101: How to Stack and Fill Like a Pro” (#21), which covers all the essentials for a strong structure.
Drip cakes typically use a buttercream or ganache base. Smooth and chilled buttercream offers the best surface for clean, consistent drips. Avoid whipped cream or soft frostings that may cause the drip to slide or melt unevenly. Once your cake is frosted and chilled (at least 30 minutes in the fridge), you’re ready to move to the fun part — the drip!
The most popular drip material is ganache, made from chocolate and heavy cream. Here’s a basic recipe for a drip that works for a 6- to 8-inch cake:
Dark Chocolate Drip:
100g (3.5 oz) dark chocolate
100ml (3.5 oz) heavy cream
White Chocolate Drip (tintable):
100g white chocolate
50ml heavy cream
(Add gel food coloring after melting)
Method:
- Heat the cream until just before boiling (don’t boil).
- Pour it over the chopped chocolate and let sit for 2 minutes.
- Stir gently until smooth.
- Let it cool until it reaches a pourable but not runny consistency.
Pro Tip: The ideal temperature for dripping is around 30–32°C (86–89°F). If it’s too hot, it will run too far; if it’s too cold, it won’t drip at all.
There are three common ways to apply drips:
- Spoon Method: Dip a spoon into the ganache and gently touch the edge of the cake, letting the ganache fall. This gives you control over each drip’s length.
- Piping Bag: Place the ganache in a piping bag or squeeze bottle and apply pressure for consistent, clean drips.
- Drip All Over: If you want a full drip layer on top, pour ganache onto the center and gently spread toward the edges so it naturally falls.
Fixing Common Drip Mistakes:
Too runny? Chill the ganache for a few minutes. You can also add more melted chocolate to thicken.
Too thick? Warm it slightly in the microwave for 5–10 seconds or add a teaspoon of warm cream.
Drips too short? Your ganache may be too cold or thick.
Drips running all the way down? It’s likely too warm or the cake isn’t chilled enough.
Once your drips are set, the fun begins! Here are some topping ideas:
Fresh Fruit: Strawberries, raspberries, figs
Meringues and Macarons
Sprinkles, chocolate shards, or gold leaf
Cookies and candy
Piped rosettes or swirls
If you want to learn how to use piping tips for cake toppers, check out our previous article: “Piping Basics: How to Decorate Cakes Even as a Beginner” (#33).
Want to make a pink or blue drip? Use white chocolate and gel-based food coloring. Avoid liquid coloring, which can seize the chocolate. For a glossy, vibrant finish, add a drop of vegetable oil or corn syrup to the ganache.
Other creative variations include:
Caramel Drip: Great for flavor and drama, but make sure it’s not too hot.
Fruit Glazes: Made with fruit puree and powdered sugar for a natural look.
Mirror Glaze: More advanced, but incredibly shiny and elegant.
Drip cakes are perfect for themed occasions:
Unicorn Cake: Rainbow drips and pastel swirls
Galaxy Cake: Dark glaze with edible glitter
Birthday Cake: Chocolate drip with sprinkles and candles
Holiday Cake: Red and green drip with peppermint candy
Always store drip cakes in the fridge, especially in warmer climates. Let the cake sit at room temperature for 30–60 minutes before serving for the best texture. The ganache will firm up in the fridge but will soften again once out.
If you’re selling cakes, offering drip cakes as a product can increase your appeal. They’re trendy and photograph well, making them perfect for social media marketing. If you’re considering turning your hobby into income, revisit “How to Make Money Selling Homemade Cakes” (#20) for guidance.
Drip cakes are stunning, delicious, and easier than they look once you understand the key techniques. Focus on perfecting your ganache consistency, work on a chilled cake, and let your creativity run wild when decorating. Whether you’re a hobbyist or an aspiring cake entrepreneur, mastering drip cakes adds serious value to your baking skills.
Next up, we’ll dive deeper into cake decoration with article #35: “Smooth Sides and Sharp Edges: Getting the Perfect Cake Finish” — a must-read if you want to level up your decorating skills with clean, professional-looking results.
