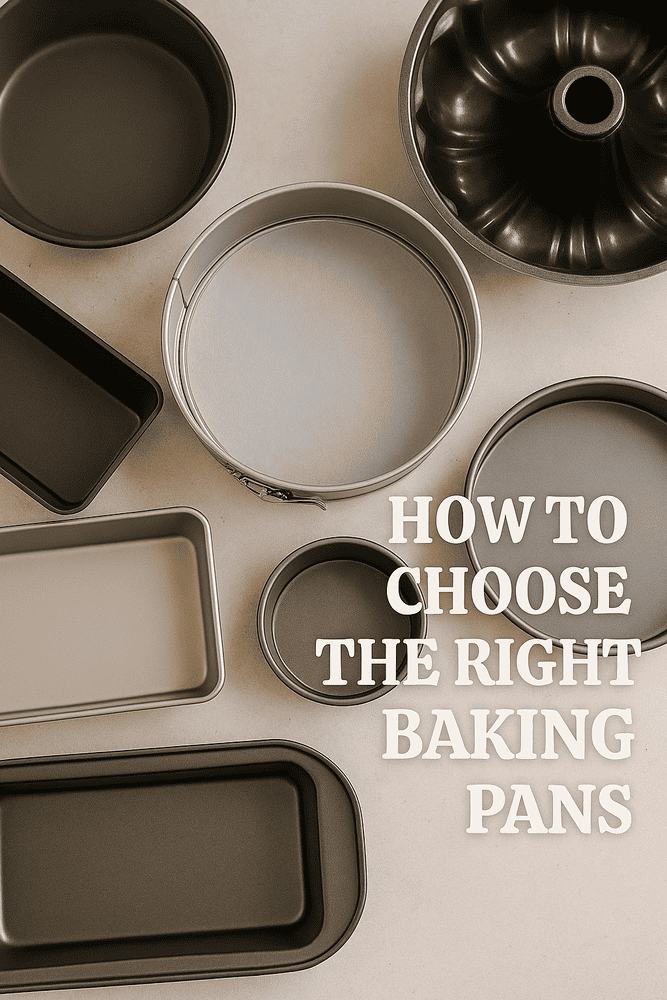
Choosing the right baking pan can make the difference between a beautifully baked cake and a kitchen disappointment. While many beginners focus on ingredients and technique, seasoned bakers know that the pan is just as important. The material, shape, size, and even the color of your baking pan can affect heat distribution, cake texture, rise, and browning. In this guide, we’ll break down everything you need to know about cake pans so you can make better choices and elevate your baking game.
This article connects with previous posts like article #4 (Essential Tools), #10 (Oven Temperature), and #11 (Eggs in Cake Baking), creating a full-circle understanding of how equipment influences results. Let’s dive into the details.
1. Materials Matter: Which Pan Should You Use?
There are several types of baking pan materials, each with its pros and cons:
Aluminum
Aluminum is a favorite among bakers for its excellent heat conduction. It bakes evenly and helps achieve a golden-brown crust. Look for heavy-gauge aluminum pans to avoid warping over time. These are great for sponge cakes, butter cakes, and general-purpose baking.
Anodized Aluminum
This is aluminum that has been electrochemically treated to increase durability and resistance to corrosion. It’s non-reactive, which means acidic ingredients like lemon or buttermilk won’t affect your batter or leave a metallic taste.
Stainless Steel
Stainless steel pans are durable and don’t rust, but they don’t conduct heat as evenly as aluminum. This can result in uneven baking unless your oven distributes heat perfectly. It’s a better option for roasting than cake baking.
Non-Stick Coated Pans
These are convenient because cakes release easily with minimal greasing. However, non-stick coatings can scratch, flake, or wear off over time. Also, they tend to brown cakes faster, so reduce the oven temperature slightly if using these pans.
Glass
Glass pans conduct heat more slowly but retain it longer, resulting in a slower, more even bake. They’re ideal for moist cakes and casseroles, but not the best for light or airy cakes like angel food.
Silicone
Flexible and non-stick, silicone pans are fun to use and easy to clean. However, they don’t conduct heat well, so cakes may bake more slowly and not brown as well. Use them for novelty shapes or single-serve desserts.
Dark vs. Light Pans
Darker pans absorb more heat, which can cause over-browning or even burning on the bottom. Lighter-colored pans reflect heat and result in more even baking. If you use a dark pan, reduce the oven temperature by 25°F (about 15°C).
2. Shape and Function: Round, Square, or Something Else?
Round Pans
These are the most common and are perfect for layer cakes. They come in various diameters (6, 8, 9 inches) and are ideal for birthday or celebration cakes. A two-inch depth is standard, but deeper pans are great for taller cakes.
Square Pans
Square pans are often used for brownies and snack cakes. They provide sharp corners and uniform slices. An 8×8 or 9×9-inch square pan is a must-have in any baker’s collection.
Rectangular Pans (Sheet Pans)
Great for large cakes like tres leches or poke cakes. The 9×13-inch pan is a classic for bake sales and family gatherings. You can also cut large sheet cakes into neat portions for selling (see article #21).
Loaf Pans
Used for pound cakes, banana bread, and quick breads. The standard size is 9×5 inches. Loaf pans promote a taller, denser cake structure and require careful monitoring of doneness in the center.
Bundt Pans
These pans have decorative fluted sides and a central tube that ensures even baking. They are perfect for pound cakes and other dense batters. Make sure to grease them thoroughly to avoid sticking.
Springform Pans
These are essential for cheesecakes and delicate cakes that can’t be easily inverted. The removable ring allows for a clean release, but they are not ideal for thin batters that may leak.
Tube Pans
Similar to Bundt pans but simpler in design. Used for angel food cakes and chiffon cakes, they allow even rise and baking through the center hole.
Novelty and Shaped Pans
Perfect for themed celebrations. While fun, these pans can be tricky for even baking and require greasing every detail. Use for kids’ parties or holidays, not for your first cake attempt.
3. Size: It’s Not Just About Fit
Choosing the right size pan isn’t only about whether it fits in your oven. It affects baking time, rise, and texture. Using a pan that’s too small causes overflow. Too large, and your cake may come out dry or flat.
Converting Pan Sizes
If your recipe calls for an 8-inch round pan and you only have a 9-inch, your cake will be thinner and bake faster. To convert accurately, use pan volume calculators or refer to our conversion table in article #22.
Depth Considerations
Deeper pans require lower temperatures and longer baking times. Shallow pans bake faster but can brown too quickly. Always adjust time and temperature when switching depths.
4. How to Know Which Pan to Use for Each Cake Type
Light, Airy Cakes (e.g., sponge, angel food)
Use light-colored, uncoated pans like aluminum tube pans. Do not grease the sides if the cake needs to climb.
Dense Cakes (e.g., pound, chocolate mud cake)
Use heavy-duty non-stick or Bundt pans for easier release and defined shape.
Moist Cakes (e.g., carrot, banana)
Use glass or anodized aluminum for even baking and to avoid hot spots.
5. Tips for Pan Care and Longevity
Never cut your cake while it’s in the pan — especially in non-stick or silicone pans.
Wash pans with a soft sponge to avoid scratching the surface.
Dry immediately to prevent rust or spotting, especially for metal pans.
Line the bottom with parchment paper to help with release and keep pans in good condition.
Store pans stacked with paper towels in between to avoid scratching.
6. Final Thoughts: Choosing Wisely is Baking Smart
A quality baking pan is an investment. Understanding the impact of pan material, shape, and size will improve every cake you bake. You’ll waste less batter, avoid uneven baking, and gain confidence in your kitchen.
Next time you follow one of our cake recipes, take a moment to consider the pan. Is it the right one for the job? With this guide, now you’ll know.
Coming up next: “How to Fix Uneven Cake Layers (and Make Them Beautiful)” — where we tackle a common issue and show you how to make professional-looking cakes even when things go wrong.